How to tie a tie-Full Windsor Knot
The full Windsor knot is sometimes known as the Windsor knot. The full Windsor knot is 25% larger than the half Windsor knot while its shape is the same as that of half Windsor knot. To learn how to tie a tie using the full Windsor knot method, follow the steps below.
- Step 1: Drape the necktie around the collar
- Step 2: Cross the wide end in front of the slim end
- Step 3: Slide the wide end up from the inner side of the necktie loop
- Step 4: Pull the wide end up and then down
- Step 5: Take a round of the wide end
- Step 6: Take the wide end up making diagonal
- Step 7: Bring the wide end back down
- Step 8: Bring the wide end from left to right forming a horizontal band
- Step 9: Bring the wide end up from the collar loop
- Step 10: Tuck the wide end tip through the horizontal loop
- Step 11: Pull the wide end down and set it all
Step 1: Drape the necktie around the collar
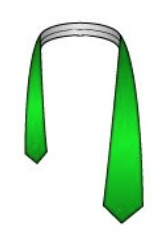
Drape the necktie around your collar in such a way that the wide end of the collar should hang on the right side 4-6 inches lower than the waistband.
Step 2: Cross the wide end in front of the slim end

Horizontally across the wide end in front of the slim end. It will make an X-shape below your chin.
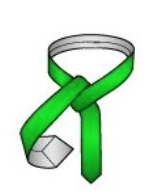
Step 3: Slide the wide end up from the inner side of the necktie loop

Hold and tuck the wide end up from the inner side of the necktie loop. Take it out upward from behind the X, as you can see in the figure below. You may use one finger of any hand to hold the X in place.
Step 4: Pull the wide end up and then down
Pull the wide end fully up and then make it down.
Step 5: Take a round of the wide end
Take a round of the wide end from behind the knot all the way from right to left horizontally.
Step 6: Take the wide end up making diagonal

Now take the wide end up making a diagonal across the front of the knot. Keep it to the left.
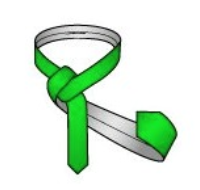
Step 7: Bring the wide end back down
Bring the wide end back down, through the loop around your collar making a loop over the top of the collar knot loop. The wide end loop should emerge on the left side.
Step 8: Bring the wide end from left to right forming a horizontal band

Forming a horizontal band, bring the wide end from the left to the right, horizontally across the front of the knot. Hold it in place and tuck a finger through it.
Step 9: Bring the wide end up from the collar loop

Again bring the wide end underneath the collar loop with the tip of the wide end aiming upward.
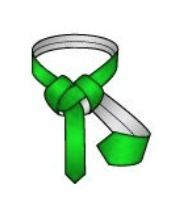
Step 10: Tuck the wide end tip through the horizontal loop

Now turn the wide end downward and tuck the wide end tip through the horizontal loop that you saved with your finger.
Step 11: Pull the wide end down and set it all

Now pull the wide end down all the way, and smooth out any slacks in the knot.
The full Windsor knot is an asymmetrical triangular-shaped knot. Also, the knot does not slip when tied correctly. Windsor knot is very comfortable to wear as it contains some space between the necktie and the collar line. For a better appearance, a full Windsor knot should be at least 1.6 inches longer than a conventional tie. The wider neck men are best suggested to wear Windsor knot. More spaced patterns with darker tones are best suited to this knot.
Different Styles of Tie Knot:

